Quick Start
Create keys, track spend, add models without worrying about the config / CRUD endpoints.
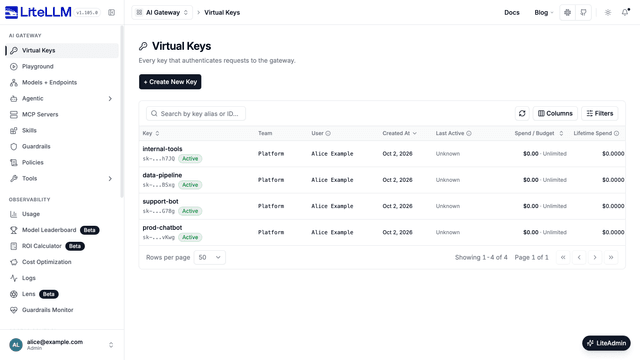
Quick Start
- Requires proxy master key to be set
- Requires db connected
Follow setup
1. Start the proxy
litellm --config /path/to/config.yaml

#INFO: Proxy running on http://0.0.0.0:4000
2. Go to UI
http://0.0.0.0:4000/ui # <proxy_base_url>/ui
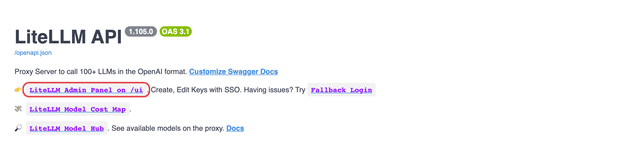
3. Get Admin UI Link on Swagger
Your Proxy Swagger is available on the root of the Proxy: e.g.: http://localhost:4000/
4. Sign in for the first time
Out of the box, the UI accepts a login built from environment variables: the username is UI_USERNAME (default admin) and the password is UI_PASSWORD. If UI_PASSWORD is unset, the master key itself is accepted as the password. Anyone who signs in this way is a proxy admin.
LITELLM_MASTER_KEY="sk-$(openssl rand -hex 32)" # master key for the proxy; must start with sk-
UI_USERNAME=ishaan-litellm   # username to sign in on UI
UI_PASSWORD=langchain        # password to sign in on UI
On accessing the LiteLLM UI, you will be prompted to enter your username, password
This login path stores a permanent, shared, cleartext admin credential in your environment, cannot be rotated per person, and leaves no way to tell which admin did what. Once you are signed in, follow the steps below to move to per-user accounts and disable it. Until you do, the dashboard shows a warning banner to every admin.
5. Create your own admin account and disable environment credential login
First, while signed in with the environment credentials, create a proxy_admin user for yourself: go to Internal Users -> + Invite User, set the role to proxy_admin, and open the invitation link it generates to set your password. You can also create the user over the API with POST /user/new and a user_role of proxy_admin; see invite users. Sign out and confirm you can sign in with your email and new password before continuing.
Then turn off the environment credential login path in your config.yaml and restart the proxy:
general_settings:
  master_key: os.environ/LITELLM_MASTER_KEY
  disable_env_credential_login: true
After the restart, UI_USERNAME/UI_PASSWORD and the master key are rejected on the login page with 401 Invalid credentials used to access UI, the warning banner disappears, and only database users (and SSO, if configured) can sign in. You can now remove UI_USERNAME and UI_PASSWORD from your environment.
Enabling disable_env_credential_login before creating a proxy_admin user with a password will make you unable to log in. If you find yourself in this situation, use the master key to disable disable_env_credential_login and restart the proxy to restore access.
If you use SSO, disable_password_login_when_sso_enabled also blocks this login path, since it rejects every username/password login once the SSO provider is fully configured. See SSO for the Admin UI.
6. Configure Root Redirect URL
When DOCS_URL is set to something other than "/", you can configure where the root path (/) redirects to using ROOT_REDIRECT_URL:
DOCS_URL="/docs"              # Set docs to a different path
ROOT_REDIRECT_URL="/ui"       # Redirect root path (/) to /ui
By default, DOCS_URL is "/", so this setting is only needed when you've changed DOCS_URL to a different path.
Keep a break-glass admin account for SSO outages
If your admins normally sign in with SSO and disable_env_credential_login is on, keep one shared proxy_admin database user with a password for the times your SSO provider is down, and store its email and password in your password vault. It signs in at /fallback/login with its email as the username. disable_env_credential_login does not block it, because that setting turns off only the UI_USERNAME/UI_PASSWORD and master key login, while database users with a password keep signing in. Give it an email that no account in your SSO provider uses, since an SSO sign-in with the same email is matched to this user and can change its role.
The simplest way to create it is from the dashboard while signed in as an admin. Go to Internal Users -> + Invite User, enter an email such as breakglass-admin@example.com, and set Global Proxy Role to Admin (All Permissions). Without SSO, open the invitation link it shows to set the password. With SSO configured, that link only signs the user in through SSO, so open the actions menu on the new user's row in Internal Users, choose Reset password, and open that link to set the password instead. Open the link in a private window, since setting the password signs that browser in as the new account. A password set through either link is ready to use, with no forced change at first sign-in.
You can also create it over the API with the master key. /user/new does not accept a password, so set it with /user/update, and pass "auto_create_key": false so /user/new does not also create an admin API key for this user:
curl -X POST "$PROXY_BASE_URL/user/new" \
  -H "Authorization: Bearer $LITELLM_MASTER_KEY" \
  -H "Content-Type: application/json" \
  -d '{"user_id": "breakglass-admin", "user_email": "breakglass-admin@example.com", "user_role": "proxy_admin", "auto_create_key": false}'

curl -X POST "$PROXY_BASE_URL/user/update" \
  -H "Authorization: Bearer $LITELLM_MASTER_KEY" \
  -H "Content-Type: application/json" \
  -d '{"user_id": "breakglass-admin", "password": "<password>"}'
The password must pass the proxy's password policy, by default at least 12 characters with an uppercase letter, a lowercase letter, a digit, and a special character, or /user/update answers 400. From v1.104.0, a password an admin sets with /user/update must be changed at first sign-in. The dashboard opens the Change Password page, and until the password is changed the session can only change it or sign out. So sign in once at /fallback/login right after creating the account, choose the final password there, and save that one in the vault.
Test the account before you need it. Sign out, open /fallback/login, and sign in with the vault credentials. You should land in the dashboard as an admin. To rotate the password later, sign in as the account and use Change Password in the account menu (from v1.104.0), or have another admin open Reset password on its row in Internal Users, then update the vault.
This account cannot sign in when disable_password_login_when_sso_enabled is on, since that setting rejects every username/password login once SSO is fully configured, so leave it off if you rely on a break-glass account. Failed sign-ins on it count toward the sign-in limit below.
Limit failed sign-in attempts
Failed username and password sign-ins to the Admin UI are counted per source address. More than 10 wrong passwords from one address within 60 seconds, across all usernames, blocks that address for 5 minutes. Accounts are never locked: the same username can still sign in from any other address. Half the address limit (5 by default) is the allowance for a single username from that address. Going over it blocks only that address and username pair, and its further failures no longer count toward the address, so one script stuck on one account does not lock out everyone else behind a shared office address.
While a block is active, every sign-in attempt for that address or pair is refused with 429 Too many failed sign-in attempts and a Retry-After header, before the password is checked. That includes the correct password, UI_USERNAME/UI_PASSWORD, and the master key typed into the form. Refused attempts do not extend the block. If you are blocked and cannot wait, the master key still works as a bearer token on the API, which the sign-in limit does not cover.
Counters live in Redis when the proxy has one, so a block applies across all workers and pods. Without Redis each worker counts on its own, so the effective limit is the configured number times the worker count; the proxy warns about this at startup. If Redis becomes unreachable, the proxy falls back to per-worker counters and keeps accepting sign-ins.
To count per address, the proxy has to know which address is the client. Set general_settings.trusted_proxy_ranges to the CIDR ranges of the load balancer or ingress in front of LiteLLM; the client is then the first X-Forwarded-For hop outside those ranges. If clients connect to LiteLLM directly, set it to [] so the peer address is used and X-Forwarded-For is ignored. If it is unset, the proxy cannot tell a client from a shared ingress, so it warns at startup and enforces only the per-username limit. IPv6 addresses are grouped by /64.
general_settings:
  trusted_proxy_ranges: ["10.0.0.0/8"]        # or [] when clients connect directly
  max_failed_login_attempts_per_source: 10    # default; the per-username allowance is half of this
  failed_login_window_seconds: 60             # default
  failed_login_block_seconds: 300             # default
  max_failed_login_attempts_per_source_overrides:
    "203.0.113.7": 50                         # a NAT gateway many admins share; 25 per username there
    "192.0.2.0/24": 100                       # the most specific match wins
    "198.51.100.4": 0                         # 0 exempts this address from both limits
An override raises both limits for that address, since the per-username allowance follows the address limit, and 0 exempts the address entirely. LITELLM_DISABLE_LOGIN_RATE_LIMIT=true turns the limit off everywhere; it is read once at startup. See Security best practices for the reasoning behind the defaults.
Invite-other users
Allow others to create/delete their own keys.
Model Management
The Admin UI provides the following model management capabilities:
- Add Models: Add new models through the UI without restarting the proxy
- AI Hub: Make models and agents public for developers to discover what's available
- Price Data Sync: Keep model pricing data up to date by syncing from GitHub
For detailed information on model management, see Model Management.
For information on sharing models and agents, see AI Hub.
Sync model pricing data from GitHub to keep your model cost information current.
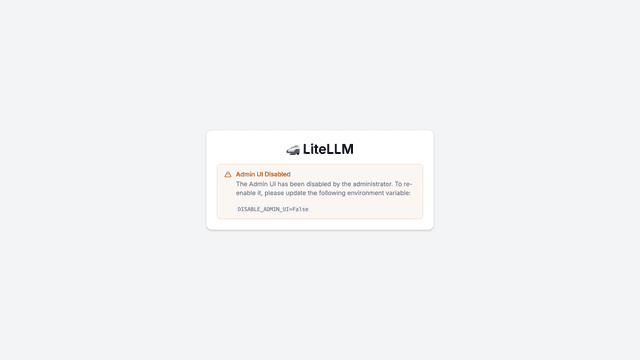
Disable Admin UI
Set DISABLE_ADMIN_UI="True" in your environment to disable the Admin UI.
Useful, if your security team has additional restrictions on UI usage.
Expected Response