Claude Code Plugin Marketplace (Managed Skills)
LiteLLM AI Gateway acts as a central registry for Claude Code plugins. Admins can govern which plugins are available across the organization, and engineers can discover and install approved plugins from a single source.
Prerequisites
- LiteLLM Proxy running with database connected
- Admin access to LiteLLM UI
- Plugins hosted on GitHub, GitLab, any git-accessible URL, or as a zip archive on an HTTPS host
Admin Guide: Managing the Marketplace
Step 1: Navigate to Skills
In the LiteLLM Admin UI, click on Skills in the left navigation menu. Only proxy admins can add, edit, enable, disable, or delete plugins.
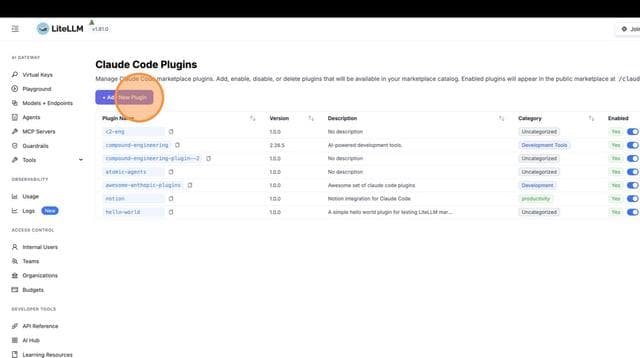
Step 2: View the Plugins List
You'll see the list of all registered plugins. From here you can add, enable, disable, or delete plugins.
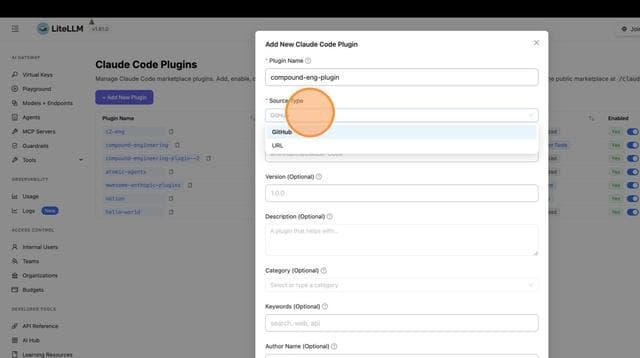
Step 3: Add a New Plugin
Click + Add Skill to register a plugin in your marketplace.
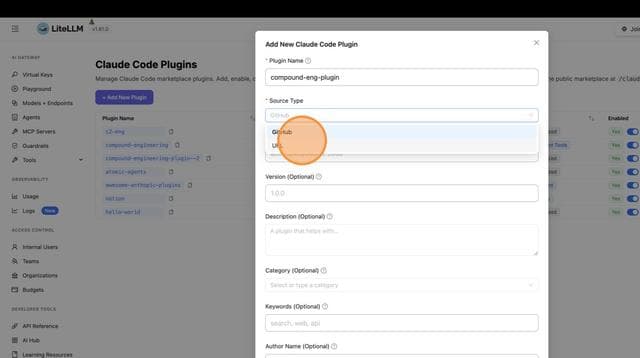
Step 4: Fill in Plugin Details
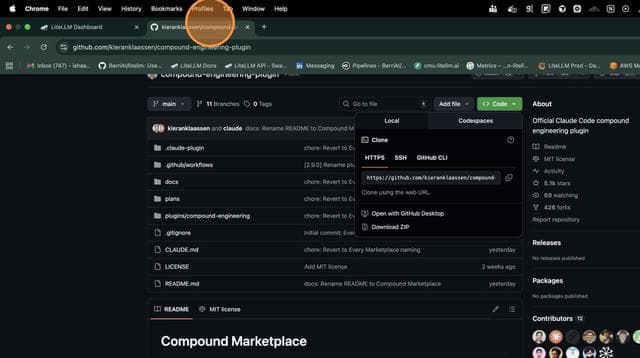
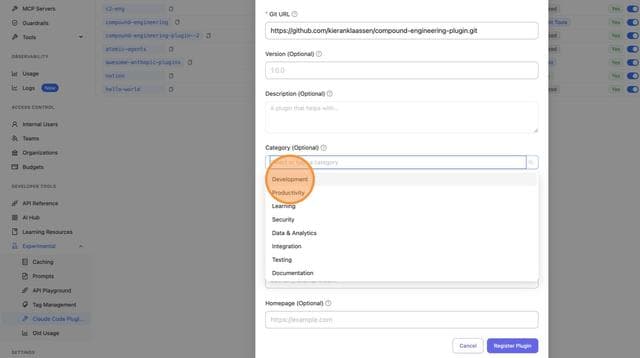
Paste the source URL first. It can be a GitHub URL, a git clone URL over HTTPS or SSH, a tree/<branch>/<path> link to a subdirectory, or an HTTPS link to a zip file. LiteLLM detects the source type and suggests a name. Then fill in the name (kebab-case, e.g. my-plugin) and any optional fields: domain, namespace, description, category, keywords, version, and author.
Step 5: Submit the Plugin
After filling in the details, click Add Skill to register it.
Step 6: Enable/Disable Plugins
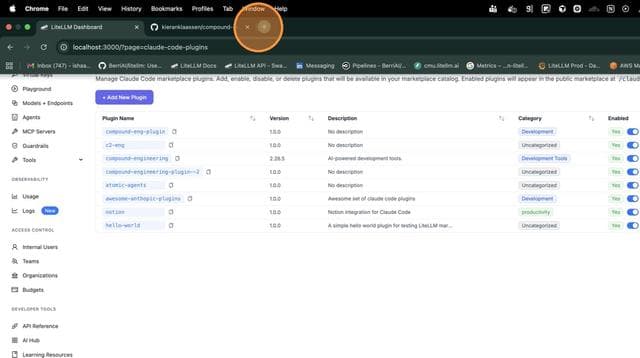
New plugins are enabled as soon as they are added. Toggle plugins on or off to control what appears in the public marketplace. Enabled plugins are visible to everyone. A disabled plugin is only visible to keys or teams granted it through Allowed Skills (object_permission.skills), as described in Private skills.
Engineer Guide: Installing Plugins
Step 1: Add the LiteLLM Marketplace
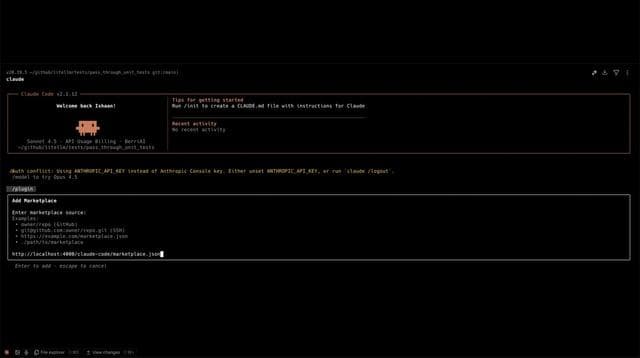
Add your company's LiteLLM marketplace to Claude Code:
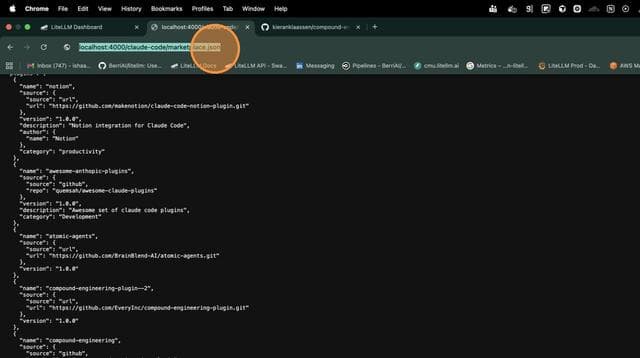
claude plugin marketplace add http://your-litellm-proxy:4000/claude-code/marketplace.json
If you were granted private plugins, add your key so they appear too:
claude plugin marketplace add "http://your-litellm-proxy:4000/claude-code/marketplace.json?key=sk-..."
Step 2: Browse Available Plugins
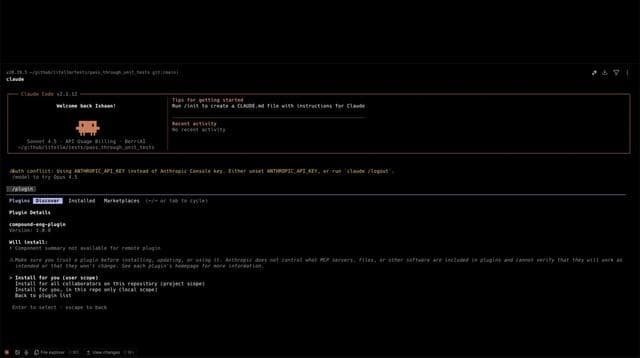
Run /plugin inside Claude Code to browse plugins from the litellm marketplace, or list them from the proxy:
curl http://your-litellm-proxy:4000/claude-code/marketplace.json
Step 3: Install a Plugin
Install any plugin from the marketplace:
claude plugin install my-plugin@litellm
Step 4: Verify Installation
The plugin is now installed and ready to use:
API Reference
Public Endpoint (No Auth Required)
GET /claude-code/marketplace.json
Returns the marketplace catalog for Claude Code discovery. Without a key it lists enabled plugins. With ?key=sk-... it also lists the disabled plugins granted to that key or its team.
curl http://localhost:4000/claude-code/marketplace.json
Response:
{
  "name": "litellm",
  "owner": {
    "name": "LiteLLM",
    "email": "support@litellm.ai"
  },
  "plugins": [
    {
      "name": "my-plugin",
      "source": {
        "source": "github",
        "repo": "org/my-plugin"
      },
      "version": "1.0.0",
      "description": "My awesome plugin",
      "category": "productivity",
      "keywords": ["automation", "tools"]
    }
  ]
}
Management Endpoints (Auth Required)
Every write endpoint below requires a proxy admin key and rejects any other key with a 401 or 403. The read endpoints accept any key and only return plugins visible to it.
POST /claude-code/plugins
Register a new plugin. This only creates; a name that already exists returns 409.
curl -X POST http://localhost:4000/claude-code/plugins \
  -H "Authorization: Bearer sk-..." \
  -H "Content-Type: application/json" \
  -d '{
    "name": "my-plugin",
    "source": {"source": "github", "repo": "org/my-plugin"},
    "version": "1.0.0",
    "description": "My awesome plugin",
    "category": "productivity",
    "keywords": ["automation", "tools"]
  }'
GET /claude-code/plugins
List the plugins visible to the caller: everything for a proxy admin, otherwise enabled plugins plus the ones granted to the key. Add ?enabled_only=true to return only enabled plugins.
curl http://localhost:4000/claude-code/plugins \
  -H "Authorization: Bearer sk-..."
GET /claude-code/plugins/{name}
Get one plugin. Returns 403 for a disabled plugin that is not granted to the caller.
curl http://localhost:4000/claude-code/plugins/my-plugin \
  -H "Authorization: Bearer sk-..."
PUT /claude-code/plugins/{name}
Replace an existing plugin. The name comes from the path and cannot change. This is a full replace, so omitted fields reset to their defaults and version is cleared if omitted.
curl -X PUT http://localhost:4000/claude-code/plugins/my-plugin \
  -H "Authorization: Bearer sk-..." \
  -H "Content-Type: application/json" \
  -d '{
    "source": {"source": "github", "repo": "org/my-plugin"},
    "version": "1.1.0",
    "description": "My awesome plugin, now with more tools",
    "category": "productivity",
    "keywords": ["automation", "tools"]
  }'
POST /claude-code/plugins/{name}/enable
Enable a plugin.
curl -X POST http://localhost:4000/claude-code/plugins/my-plugin/enable \
  -H "Authorization: Bearer sk-..."
POST /claude-code/plugins/{name}/disable
Disable a plugin.
curl -X POST http://localhost:4000/claude-code/plugins/my-plugin/disable \
  -H "Authorization: Bearer sk-..."
DELETE /claude-code/plugins/{name}
Delete a plugin.
curl -X DELETE http://localhost:4000/claude-code/plugins/my-plugin \
  -H "Authorization: Bearer sk-..."
Plugin Source Formats
- GitHub
- Git URL
- Git Subdir
- Zip Archive
{
  "name": "my-plugin",
  "source": {
    "source": "github",
    "repo": "organization/repository"
  }
}
{
  "name": "my-plugin",
  "source": {
    "source": "url",
    "url": "https://github.com/org/repo.git"
  }
}
Use this format for GitLab, Bitbucket, or self-hosted git repositories.
{
  "name": "my-plugin",
  "source": {
    "source": "git-subdir",
    "url": "https://github.com/org/repo.git",
    "path": "plugins/my-plugin"
  }
}
Use this format when your plugin lives in a subdirectory of a git repository. The path field must be a relative path of slash-separated segments (alphanumeric, dots, hyphens, underscores only).
{
  "name": "my-plugin",
  "source": {
    "source": "archive",
    "url": "https://bucket.s3.amazonaws.com/plugins/my-plugin.zip",
    "sha256": "<optional 64-character hex digest>"
  }
}
Use this format for a plugin packaged as a zip file on any HTTPS host, such as S3. The url must use HTTPS, and sha256, when set, must be a 64-character hex digest of the archive.
Example: Setting Up an Internal Plugin Marketplace
1. Create Internal Plugins
Structure your plugin repository:
my-company-plugin/
├── plugin.json          # Plugin manifest
├── SKILL.md            # Main skill file
├── skills/             # Additional skills
│   └── helper.md
└── README.md
2. Register Plugins via API
# Register your internal tools plugin
curl -X POST http://localhost:4000/claude-code/plugins \
  -H "Authorization: Bearer $LITELLM_MASTER_KEY" \
  -H "Content-Type: application/json" \
  -d '{
    "name": "internal-tools",
    "source": {"source": "github", "repo": "mycompany/internal-tools"},
    "version": "1.0.0",
    "description": "Internal development tools and utilities",
    "author": {"name": "Platform Team", "email": "platform@mycompany.com"},
    "category": "internal",
    "keywords": ["internal", "tools", "utilities"]
  }'
3. Use in Claude Code
Send engineers the marketplace URL:
# One-time setup for each engineer
claude plugin marketplace add http://litellm.internal.company.com/claude-code/marketplace.json

# Install company plugins
claude plugin install internal-tools@litellm
Troubleshooting
Plugin not appearing in marketplace:
- Verify the plugin is enabled in the admin UI, or that it is granted to your key and you added the marketplace with
?key= - Run
claude plugin marketplace update litellmto refresh the local copy of the catalog
Installation fails:
- Ensure the git repository is accessible from the engineer's machine
- For private repos, engineers need appropriate git credentials configured
- For
git-subdirsources, check thatpathmatches the skill's directory in the repository; Claude Code reportsSubdirectory '<path>' not foundotherwise
Database errors:
- Verify LiteLLM proxy is connected to the database
- Check proxy logs for detailed error messages